Below is a testimonial from a current Eat Smart, Move More, Prevent Diabetes participant, Susan:
“I had my A1C checked, and it’s gone down from 6.3% to 5.9% today! The weight loss has been steady (10.4 pounds–it went faster when I was younger), but the A1C was my main reason for starting your program. I know it needs to be lower, but this is real progress. Thanks so much for the information you share and the encouragement! I’ve been telling friends about your program. It’s excellent information, encouragement, and accountability– and the cost is so minimal.”
–Susan, Current Eat Smart, Move More, Prevent Diabetes Participant
Mindful eating is an evidence-based strategy to maintain or lose weight, as eating mindfully helps us pay attention to what and how much we are eating. Mindful eating strategies include paying attention to our hunger levels (as the Grinch would say, “am I eating because I’m bored?”), eating slowly with awareness of each bite, and noticing the taste, texture, and flavors of each food item.
Eat One Piece at a Time
I am always trying to incorporate more mindful eating practices into my everyday routines. I put all screens away while I am eating (turn TV off, put phone away during lunch, move away from my computer), and put my fork down between bites to slow down my meal. Recently I noticed another way I can eat more mindfully. Taking one piece (or bite) at a time. I know it sounds obvious, but with certain food items I noticed I would take a handful without realizing it. By taking one piece, I can slow down, pay attention to what and how much I am eating, and better enjoy the flavors.
When I would eat popcorn I would grab a few at a time to eat without thinking anything about it. At the bottom of a tortilla chip bag (or bowl), I would take two or three smaller pieces that were broken to eat at once instead of one at a time. I would get a handful of nuts and eat a few at a time and at a recent party there was an M&M bowl and I grabbed two and popped them in, all without thinking twice about it.
I have started to more mindfully eat these “smaller” hand-held items one at a time and with intention. It helps me slow down, enjoy each bite, and be more aware whether or not I am actually hungry or if I am getting full. Overall, slowing down is key for me. I tend to rush through a meal, move on to the next thing. But taking one piece or one bite at a time, putting down my fork, enjoying the company, and paying attention to my hunger levels have all helped me to eat more mindfully. For more mindful eating strategies, download our free PDF, 12 Mindful Eating Strategies, and check out our recent research on mindfulness featured in Consumer Reports.
Have you ever found yourself fighting to stay awake or
distracted during the workday because you failed to get a decent night’s sleep
due to stress? Have you missed a deadline or made an error for a work project
because of chronic pain or other symptoms that distracted or interrupted your
work? Have you observed co-workers going through the motions in the workplace
but not really “there” due to lingering illness, family or personal crises or
some other physical or mental health issue? If you answer “yes” to any of these
questions, you may be seeing the results of “presenteeism.”
When you signed the contract or accepted the job offer for your job, it was reasonable for you and your employer to expect that you would bring high energy, full engagement and your best-self to the job each workday. However, every day brings changes and challenges that might impact your physical, mental and/or emotional ability to perform optimally at work and meet your and your employer’s performance expectations. Health economists use the term presenteeism to describe when an employee shows up for work but does not perform at full capacity due to a physical, mental or emotional condition. Unlike absenteeism that accounts for the costs associated with an employee absent from work, presenteeism is often more prevalent and costly from both employee and employer perspectives. It has been estimated that the costs associated with presenteeism is 10 times greater than costs of absenteeism.
“When an employee worked at 75% of their maximum productivity level, the result was a loss of three months of productivity“
According to a study by Global Corporate Challenge (GCC),
employees take an average of four sick days per year but admitted to being
unproductive an average of 57.5 days per year (Smith, Sandy, “Presenteeism
Costs Business 10 Times More than Absenteeism,” EHS Today, March 16, 2016). Dr.
Olivia Sackett who conducted the study, used the World Health Organization’s
(WHO) Workplace Health and Productivity Questionnaire (HPQ) to validate results
of her study that showed when an employee worked at 75% of their maximum
productivity level, the result was a loss of three months of productivity. The
annual financial costs of absenteeism in the US is approximately $150 billion
dollars. However, the annual costs of employees who came to work but were not
fully productive – presenteeism – is $1,500 billion, ten times the cost of
absenteeism.
Presenteeism has the potential to significantly impact the productivity and function of a workplace. The impacts can be damaging and devastating to a business, organization and the employees who contribute to the success of that business and depend on it for income and professional gratification. Employers need to not only recognize the effects of presenteeism but should proactively take steps to minimize causes of presenteeism wherever possible. Employers should consider the benefits of providing worksite wellness programs, such as Eat Smart, Move More, Prevent Diabetes, that include and promote stress management, physical activity, healthy eating, primary prevention and offer chronic disease management, EAP services and access to mental health services. Such programs can greatly reduce the productivity and financial costs of presenteeism.
Well, the heat has officially come to the Piedmont region of North Carolina and it looks like it is here to stay for the summer. I love the longer days, the spontaneous outdoor adventures and how summer just feels like a more carefree time of year. What I do not love is the air made of hot soup and the fact that I have to walk my dog at least twice a day in the aforementioned soup air. So, here are my strategies for staying cool during North Carolina’s hot summers.
Early and Late: Avoid the midday sun at all costs – 9 am to 3 pm. I walk my dog in the early morning or the evening, when it is likely to be cooler outside. It is best to gradually acclimate yourself to the heat.
Breathable Clothing: Ditch the denim jeans. Wear loose, light-colored clothing during the summer. The lighter color will help reflect heat.
Water, Water, & More Water: Dehydration is a key factor in heat illness. Help your body sweat and cool down by staying hydrated with water. Before you step out the door drink a glass or two of water. Carry a bottle of water with you during your outdoor activities.
Sun Protection: Total sun protection requires a multifaceted approach: wear sunscreen, sunglasses, and a hat. If you can, try to find Ultraviolet Protection Factor (UPF) clothing. UPF ratings specifically apply to apparel, while Sun Protection Factor (SPF) applies to sunscreen’s effectiveness. UPF clothing will enhance your protection against sun-related health risks. Most importantly, monitor and limit the amount of time you expose yourself to peak daylight hours.
Watch the Temperature and Have a Backup Plan: Pay attention to the weather forecasts and heat alerts. Towards the end of NC summers, we usually get a few heat advisories. During those times, I find it is best to stay indoors as much as possible. There are several exercises that can be done from the comfort of an air-conditioned building. Work out at your home, the gym, or walk laps inside your local mall.
Home Exercise Tip -> I’m a big fan of “The Office.” I am trying to limit my screen time but for now I compromise by turning it into a TV Workout like this one:
The Office TV Workout
15 CRUNCHES: Jim looks at the camera.
15 SQUATS: Dwight says “Fact.” or “Question.”
10 BURPEES: Angela gets annoyed.
20 CALF RAISES: Pam says. “Dunder Mifflin- this is Pam.”
The American workforce spends one third of the day at their workplace, oftentimes sitting at a desk, which has led to increasingly sedentary lifestyles. Studies show that sedentary lifestyles result in higher incidences of obesity and heart diseases among Americans. Sitting for long periods of time has also been associated with higher risk for developing type 2 diabetes.
Our body is designed to move, so alternating between sitting, standing and walking regularly throughout the day can promote a healthier lifestyle. Moving regularly lowers the risk of musculoskeletal pain such as lower back/neck pain and reduces risk of eye strain. Staying active also helps the circulatory and digestive system to function optimally, in turn reducing the risk for chronic diseases such as heart diseases, cancer and type 2 diabetes.
Below are some tips to beat sedentary habits and squeeze in some physical activity at work:
❖ Make it a habit to get up and stretch every hour throughout the workday. Set a reminder on your phone or Fitbit device to help you.
❖ Try to stand up every time you
make or answer a phone call. Using a headset may make it easier to stand and
move around while talking on the phone. You can even march in place or pace in
circle to keep moving.
❖ Use an adjustable sit/stand
workstation. This provides flexibility to change between sitting and standing
when working at your desk. When alternating between standing and sitting,
posture changes and different muscle groups are used.
❖ Take the stairs instead of
elevators when possible. Start with at least a floor or two and then slowly
build up your endurance to climb more floors.
❖ Use the breakroom or restroom
farthest from your workstation or even on another floor to help you get those
extra steps.
❖
It is also a good idea to have some hand weights and resistance bands at your
desk to do some biceps curls, triceps extensions, overhead presses and lateral
rises during breaks. Try some basic online demos to help you get started to
avoid injuries.
❖ Go on a light walk during
lunch. Instead of driving or ordering in, walk to a nearby restaurant for lunch
to fit in some of your daily activity.
❖ Instead of emailing or using
phone, walk to your coworker’s desk / office to talk.
❖ Walking meetings for informal
discussions to add in some activity.
❖ Stay active as a team –
schedule walks, runs or other form of exercise as a team which could be done
during lunch breaks, before or after work to help everyone stay motivated to be
active.
Exercise is the most transformative thing that you can do to your brain says neuroscientist Wendy Suzuki. Listen to her TED talk to learn more about how staying active protects our brains against neurodegenerative diseases such as Alzheimer’s.
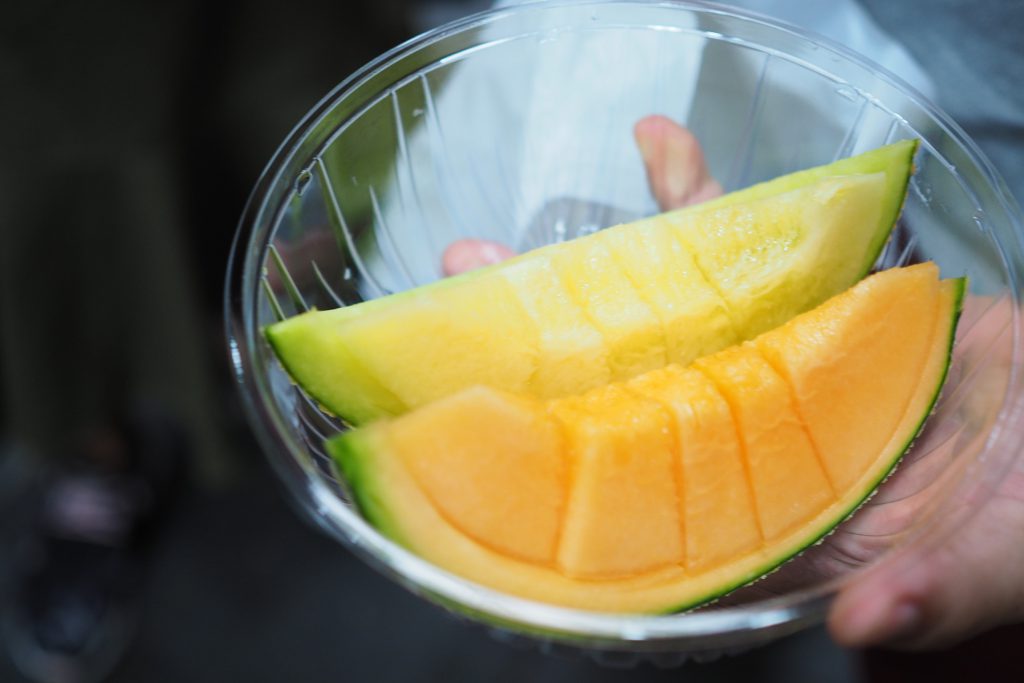
As the weather has been warming up, I have been absolutely craving a good melon recipe, and wanted to find something unique and savory that could be a simple addition to a dinner party. And wow, did this recipe deliver! Sweet, salty, and citrusy, it is light, filling, and a perfect way to get both fruit and vegetables added to your meal.
The recipe calls for Castelvetrano olives, which are fantastic, but I made this recipe with a can of regular green olives from Trader Joe’s which worked just fine. A mandoline works best for the honeydew and fennel, however, if you don’t have one, just slice as thinly as you can with a sharp knife.
Dress just before serving so that the fennel will still be crunchy and the melon retains its juices.
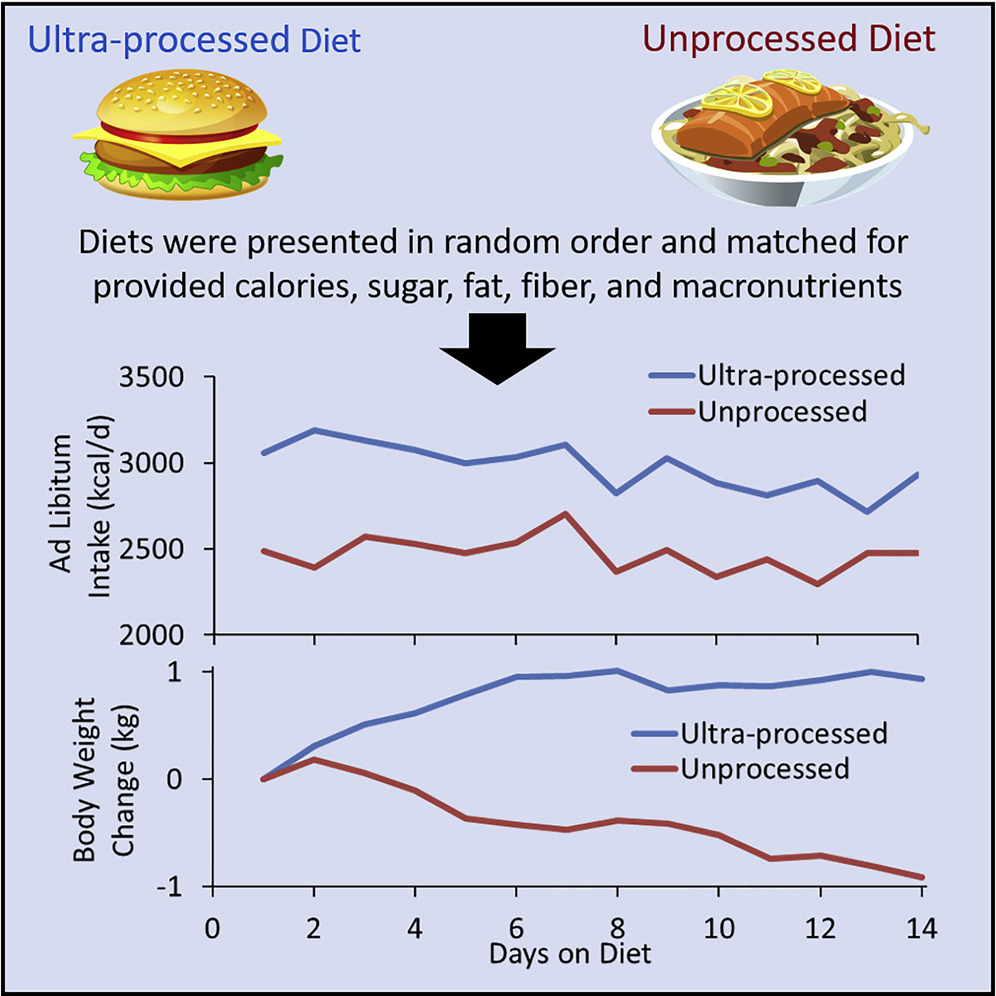
A recent study1 found that people ate 500 calories a day MORE when they ate ultra-processed foods. This study was conducted in a testing facility where adults were served either foods that were ultra-processed including hot dogs, tater tots, sugary cereal, chips, cookies, and pudding OR unprocessed foods including fresh fruits and vegetables, unsweetened yogurt, beans, nuts, seafood, poultry, and grains. Participants could eat as little or as much as they wanted. For the two weeks when participants ate ultra-processed foods, they ate about 500 calories per day more and gained weight. Participants on the unprocessed diets lost weight.
So, what is going on here? Avoiding highly processed foods means you are concentrating on eating lots of vegetables, fruits, beans, fish, poultry, nuts, and whole grains. We know these should be the cornerstone of our diet. Filling up on these foods and passing on the processed foods helps us consume fewer calories.
Source: Figure 1. Hall et al. Ultra Processed Diets Cause Excess Calorie Intake and Weight Gain: An Inpatient Randomized Controlled Trial of Ad Libitum Food Intake, Cell Metabolism (2019), https://doi.org/10.1016/j.cmet.2019.05.008.
Source: 1Hall et al., Ultra-Processed Diets Cause Excess Calorie Intake and Weight Gain: An Inpatient Randomized Controlled Trial of Ad Libitum Food Intake, Cell Metabolism (2019), https://doi.org/10.1016/j.cmet.2019.05.008
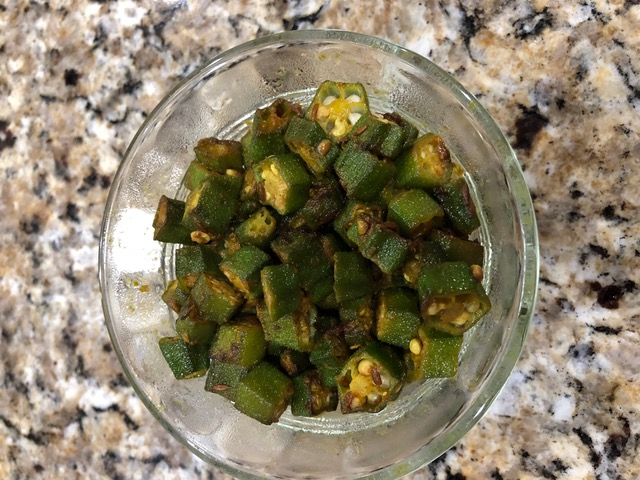
Okra, commonly referred to as
Lady Finger in India, is generally a kids’ favorite and was mine as well
growing up. It still is one of my favorites and also for my kids now. When I
came to the United States, I was surprised that okra was not as popular here. I
am sharing the recipe below with the hope that more people will try making this
low-calorie vegetable that is a very good source of some minerals, vitamins, and
fiber. One hundred grams of okra only has approximately 30 calories and 3 grams
of fiber.
The recipe below is super quick
and very easy to make – my go to in a time crunch, especially if I have already
cut the okra ahead of time. The spices bring out a flavor that is hard to
resist. You can adjust (or omit) any of the spices listed in the recipe below
to suit your taste. You can also add some chopped onions if desired.
Spicy Okra Stir-fry
Ingredients:
1 lb fresh okra
1 tbsp olive oil
1 tsp cumin seeds
1 tsp turmeric powder
½ – 1 tsp red chili powder
1 ½ tsp coriander powder
½ tsp garam masala
(optional)
Salt to taste
Directions:
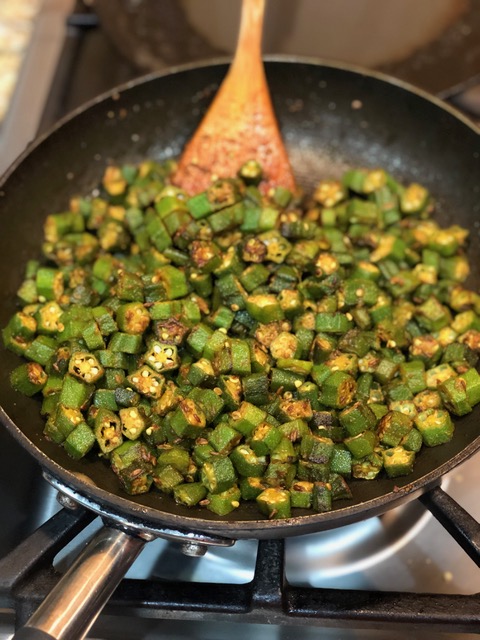
To prep the okra cut off
the ends and dice into small pieces (about ½ inch or slightly less – see
picture).
Heat olive oil in a
skillet. Okra cooks better on a non-stick
surface but you can use others if needed.
When the oil is hot, lower
the flame add all spices except salt and sauté for 30 seconds.
Add cut okra and mix well.
Add salt and mix again. If making this dish
with onions, add them and cook for a few minutes before adding okra.
Leave the skillet uncovered
and cook on medium heat with occasional stirring every few minutes. Lower the heat if okra sticks to the bottom
of the skillet.
Cook until desired
tenderness. Serve warm with whole wheat pita or Indian roti/chapati.
So it’s been two years since I got my gym membership. I shared my strength training success after joining the gym, and continue to share my journey with you. of my successes and challenges this year have outside of the gym walls and away from the weights and machines. The workouts keep me honest and help me to get other places I want to be.
I started off with a 10 Mile race in April 2018.. over hills… down hills.. over more hills.. I made it!
We spent a week this fall hiking in Idaho and then in Yellowstone National Park.
I was getting ready to train for a half marathon and went to see a Physical Therapist. That has changed everything for the last six months. We started working on ankle strength and quickly learned that my left hip was really weak and tight. So I have spent a lot of time working on stretching and strengthening some very small muscles that are responsible for a lot of movement and stability. Once these muscles are stabilized and strong I will go back to heavier training. But yes, I can still do decline pushups.
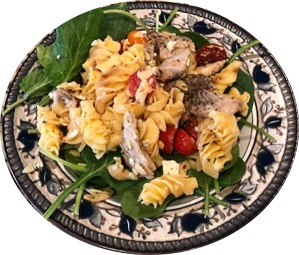
I love pasta! And
when I recently measured, it appeared that my bowls hold about twice as much
pasta as I thought. Much to my dismay,
the portion predicted to be only about a cup was actually almost two cups.
In an effort to decrease my portion sizes and increase my
vegetable intake, while feeling satisfied with a full bowl, I recently tried an
experiment by filling my bowl first with two cups of raw spinach followed by ¾ cup
of my favorite basil
and tomato pasta with feta (for this
dish, I substituted chicken instead of shrimpand gluten-free quinoa pasta instead of whole wheat penne). In
order to fill my bowl, two servings of the pasta dish is needed equaling close
to 850 calories, as each serving is ~428 calories. Instead, I tried adding the two cups of raw
spinach, totaling only 15 calories, which helped me keep my entire dinner under
500 calories and very satisfying. My bowl was nice and full and I actually ate
MORE food by volume once I added the spinach vs. another serving of pasta,
while eating LESS overall calories.
Other ideas for eating MORE volume to eat LESS calories:
Replace meat with spinach and mushrooms in omelets